A Walk Around The Graphical User Interface

Last Updated: 29th June 2003


<< Installation Chapter Contents Chapter FAB Menus Chapter >>

Introduction
Top Left   Top Right
  Section Quicklinks
GUI Elements
Browser ID & Title
Navigation Toolbar
URL Toolbar
Fastlinks
Browser Tabs
Transfer Animation
Display Area
Status Toolbar
Drag & Drop
 
Bottom Left   Bottom Left
IBrowse², like its predecessor, has an extensively customisable Graphical User Interface (GUI), which is made possible by using Stefan Stuntz' MagicUserInterface, or MUI as it's more commonly known. Making use of the Drag & Drop feature, the GUI of the main IBrowse² window can be re-arranged, allowing you to tailor the layout to meet your individual requirements.

GUI Elements
Before we take a look at the Drag & Drop aspects of the main GUI window, we will look at the various elements that make up the GUI itself. The default IBrowse² GUI layout is as follows:

Default IBrowse² GUI
(click on the image for a full size version)

1 ~ Browser ID & Title
This area of the main IBrowse² window(s) is used to display two pieces of information: the current Browser ID, and the Title of the web page displayed in the current browser. The Browser ID is a unique number, denoted by the [ ] brackets, assigned to each browser opened by IBrowse² during a session. It can be used when using the ARexx interface to perform actions on a specific browser, rather than the current one. When using multiple browsers in a single window, the number displayed will change depending on which browser is current. The Title displayed, is that specified by the <title> tag in the HTML itself, or for non-HTML files (e.g. an image, or plain text file), the filename will be displayed.

2 ~ Navigation Toolbar
This area of the main IBrowse² window(s) is one of the Drag & Drop GUI elements which can be moved around into various locations within the window itself. The Navigation Toolbar serves two purposes: to provide the navigation controls for using the Internet, and to provide additional space for adding your own custom buttons. In its default configuration, the following navigation controls are available:
Navigation Toolbar
A ~ Back Button  Back Button
This navigation button will return you to the previously displayed web page for the current browser, for the current session. By repeatedly clicking this button, you can keep stepping back through your history to the very first page for the current browser, unless the history has been cleared using the Menus » Navigation » Flush browser history menu option, at which point the button will be disabled. Using the right mouse button over this button will open a FAB Menu listing all of the previously visited links, which will allow you to jump directly to a link of your choosing.
B ~ FAB Menus  FAB Menus
Using the right mouse button over the Back, Forward, Home or Reload button, will open a FAB Menu in the context of the button you use. The Back and Forward buttons, will show a history of the web pages you have visited in the current browser, for the current session. This allows you to quickly jump to a specific web page from your Browser History, without having to step through each one in turn. The Home button will show two hard coded options, the IBrowse² and Amiga Inc. homepages. Finally, the Reload button will show you two hard coded options, All and Images, which will reload the whole web page, or just the images, respectively.
C ~ Forward Button  Forward Button
This navigation button behaves slightly differently to the Back button, in that it will only list a history of visited web pages for the current session, that are visited after the current web page. Clicking on the button will take you to the last web page that you visited while viewing the current web page. Using the right mouse button over this button will open a FAB Menu listing all of the previously visited web pages, which will allow you to jump directly to a web page of your choosing.
D ~ Home Button  Home Button
This navigation button will instruct IBrowse² to load the web page you have configured under Preferences » Network » Location. Using the right mouse button over this button will open a FAB Menu listing two hard coded options, which will take you to the IBrowse² and Amiga Inc. homepages.
E ~ Reload Button  Reload Button
This navigation button will instruct IBrowse² to reload the web page displayed in the current browser, from the originating location (web server, CDROM, hard disk etc), therefore avoiding the version in your local cache. Using the right mouse button over this button will open a FAB Menu listing two hard coded options, All and Images. All is used to reload all of the data for web page displayed in the current browser, where as Images will only reload the image data.
Info Reloading Images will not magically load any images that have errors. It is used to reload images after browsing with Preferences » HTML » Images » Load images set to None or Imagemaps, as well as those that have been interrupted by using the Stop button, due to a network error or flushed from display using one of the image flushing options found under Menus » Cache » Memory cache.
F ~ Load Images Button  Load Images Button
This navigation button will instruct IBrowse² to load any images on the web page being displayed in the current browser, that have not been loaded, or that have been flushed from display using one of the image flushing options found under Menus » Cache » Memory cache.
Info This will not magically load any images that have errors. It is used to load images after browsing with Preferences » HTML » Images » Load images set to None or Imagemaps, as well as those that have been interrupted by using the Stop button, due to a network error or flushed from display using one of the image flushing options found under Menus » Cache » Memory cache.
G ~ Search Button  Search Button
This navigation button will open the Search Current Webpage window, allowing you to perform a word search on the web page displayed in the current browser. If the web page is frames based, the search will be performed on the current frame.
H ~ Stop Button  Stop Button
This navigation button will instruct IBrowse² to stop the current transfers the current browser is performing, except for those being performed by the Download Manager.
The Navigation Toolbar is a rather powerful feature of IBrowse², allowing you to add far more than just simple navigation controls to the GUI. It is also possible to embed other GUI elements into the Navigation Toolbar, such as the Fastlinks or Transfer Animation. Doing so will reduce the amount of screen space taken up by the various GUI elements, providing you with an increased display area. Custom buttons can also be added, which can load URLs (like the Fastlinks), run external Amiga compatible applications, or execute ARexx scripts. Please refer to Preferences » GUI » Toolbar for further details on customising the Navigation Toolbar.
Like some other elements of the GUI, keyboard control is also provided for the Navigation Toolbar buttons, via (un-qualified) hotkeys. A list of all the standard IBrowse² shortcut hotkeys can be found in the Hotkeys chapter, and the remaining keys can be assigned to your own custom buttons in Preferences » GUI » Toolbar » Label.
The default Navigation Toolbar button images can also be customised, but unfortunately this cannot be performed via the IBrowse² preferences. Please refer to the Advanced Topics chapter for further details on customising the default button images.
! The images used in the Navigation Toolbar will use a number of pens from the screen palette in order to be displayed. On screens of 8-bit or less (i.e. 256 colours and below), there are fewer pens available for IBrowse² to use when displaying web page images. It is therefore suggested to set Preferences » GUI » Toolbar » Display to Text under these circumstances.

3 ~ URL Toolbar
This area of the main IBrowse² window(s) is one of the Drag & Drop GUI elements which can be moved around into various locations within the window itself. The URL Toolbar serves two purposes: to enter the URL, and to some degree, a small amount of URL management. The URL Toolbar itself is made up of four separate controls:
URL Toolbar
A ~ Location Gadget  Location Gadget
This gadget is used to enter the URL of the web page you wish to display, and can be achieved in a number of ways:
There are a few features in IBrowse², which make entering a URL into the Location gadget manually, even easier. Firstly, you are not required to prefix the URL with http:// as IBrowse² will automatically prefix this protocol to the URL before the request is sent to the server, unless what you have entered begins with ftp., in which case ftp:// will be prefixed instead. Secondly, if Preferences » General » URL Completer is enabled, IBrowse² will automatically complete the URL as you type, alphabetically best guessing the URL against a list of cached URLs, including the protocol should you choose to manually enter it.
URL Protocol Completion Example
Example of URL protocol completion
URL Address Completion Example
Example of URL address completion
Enabling Preferences » General » URL Completer » Case sensitive will cause IBrowse² to only match URLs exactly as entered, therefore http://www.somesite.com will not be matched when entering HTTP://WWW.SOMESITE.COM and vice versa. URLs are prefixed with the protocol in which the data is supplied, and IBrowse² supports the majority of the non-proprietary protocols, either internally or via an external program. The protocols that IBrowse² currently supports are described in the Protocols chapter, and consist of:
  • http://
  • https://
  • ftp://
  • file://localhost/ & file:///
  • gopher://
  • telnet://
  • tn3270://
  • mailto://
B ~ URL History Button  URL History Button
This gadget is used to open a drop down menu with a history of all URLs manually entered into the Location gadget, for the current session. The drop down menu will open below the Location gadget, and clicking on an entry will copy the URL into the Location gadget, then close the drop down menu automatically, allowing you to edit the URL if required, before sending the request for the web page. The history applies to the window, so any new browsers that you open will inherit the history from all the other browsers that have been, or still are, open. If you wish to close the drop down menu without selecting an entry, or if the menu is empty, then you can simply click on the button again to close the menu, or if the button is obscured by the menu iteslf, use the ESC key.
URL History Example
Example of URL History
C ~ Open Bookmarks Button  Open Bookmarks Button
This gadget is used to open the bookmark manager you are using, either Contact Manager if Preferences » General » Use Contact Manager for bookmarks is enabled, or Hotlist Manager if it is not.
D ~ Add Bookmark Button  Add Bookmark Button
This gadget is used to add the current URL to the bookmark manager you are using, either Contact Manager if Preferences » General » Use Contact Manager for bookmarks is enabled, or Hotlist Manager if it is not. Newly added bookmarks will be shown in the Menus » Bookmarks menu if you are using the Hotlist Manager to maintain your bookmarks, and also have Preferences » General » Show new Hotlist Manager entries in menu enabled. The bookmark manager will not be opened when you perform this operation, as it is all done transparently to the user.
Like some other elements of the GUI, keyboard control is also provided for the URL Toolbar, via (un-qualified) hotkeys. A list of all the standard IBrowse² shortcut hotkeys can be found in the Hotkeys chapter.

4 ~ Fastlinks
Fastlinks Example
This area of the main IBrowse² window(s) is one of the Drag & Drop GUI elements, which can be moved around into various locations within the window itself. The idea of Fastlinks can be likened to that of bookmark managers - they are used to store your favourite websites. The main difference between the two is ease of use. Clicking on a Fastlink will load that web page into the current browser, without the need to go through the hassle of opening the bookmark manager, finding the bookmark, and then clicking the link to load the web page. There is however, a clear disadvantage to Fastlinks: they take up space within the GUI which could other wise be used for the actual web page display. By combining the two systems, and using the preferences, especially the Preferences » GUI » Toolbar » Fastlinks item, you can create a set up that will take up minimal GUI space, but still maintain the flexibility of Fastlinks for important, handy websites, and the bookmark managers for those website that you don't visit as often.
Fastlinks In Navigation Toolbar Example
Example of Fastlinks embedded into Navigation Toolbar
In addition to just being used as simple bookmark buttons, the Fastlinks system in IBrowse² has been overhauled, now allowing you to not only configure a button to load a web page, but also to call an external Amiga compatible program, or to launch an ARexx script.

5 ~ Browser Tabs
One of the new features of IBrowse² was the introduction of Browser Tabs. These tabs are used to open multiple browsers in one window, reducing the clutter often associated with multiple window applications. The Browser Tabs also introduced a more user friendly GUI, and IBrowse² 2.3 improves on this, providing enhanced Drag & Drop functionality, Hotkey control and FAB Menus.
Two display options are available for the Browser Tabs, they can either be shown leaving a space for Drag & Drop activities, clearly identifying the position where the new Browser Tab will be opened, or be shown filling the entire width of the Browser Tab GUI element, which will dynamically resize when Drag & Drop'ing in the Browser Tab drop zone. Enabling Preferences » GUI » Show space for new tab will provide the first display option, and disabling will provide the second option - the dynamic adjustment will happen automatically when Drag & Drop'ing to the invisible drop zone.
Browser Tabs Example
A ~ Inactive Browser Tab  Inactive Browser Tab
One of the great aspects of using multiple Browser Tabs, is being able to quickly flip to another tab to read one web page, while another loads in the background. One of the problems this introduces, is how do you know when the web page in the inactive browser has loaded ? The solution to this is to show visually when the web page has completed its activity, which is achieved by changing the Inactive Browser Tabs' title to white¹. Inactive Browser Tabs are also shown slightly smaller compared to the Active Browser Tab to make differentiation between the two states clearer.
Info ¹ The actual colour used is dependant on your MUI configuration for the "shine" pen. Please refer to the Advanced Topics chapter for further information.
B ~ Active Browser Tab  Active Browser Tab
The Active Browser Tab is the front most tab displayed in the Browser Tab GUI element, and is slightly larger than the Inactive Browser Tabs. The ID of the Active Browser Tab is also displayed in the Browser ID area of the GUI.
C ~ Browser Tab FAB Menu  FAB Menus
Using the right mouse button over an Active Browser Tab or Inactive Browser Tab, will open a FAB Menu giving you access to two hard coded options: Reload and Close browser. The Reload option functions just the same as the Reload button on the Navigation Toolbar does, it will instruct IBrowse² to reload the web page displayed in that browser. If this is performed on an Inactive Browser Tab, the title will change to white¹ once the browser activity has finished. The Close browser option functions just the same as Menus » Project » Close browser, and will close the browser tab this option is selected for. If this is the last browser in the current window, then it will also close the window, and if that is the last IBrowse² window, it will also quit IBrowse².
Info ¹ The actual colour used is dependant on your MUI configuration for the "shine" pen. Please refer to the Advanced Topics chapter for further information.
D ~ Browser Tab Drop Zone  Browser Tab Drop Zone
When using Drag & Drop to create a new Browser Tab, you need to drop the link into the drop zone in the Browser Tab GUI element. This drop zone can be either visible, or invisible depending of the setting of Preferences » GUI » Show space for new tab. With this option enabled, a space is left after the existing Browser Tabs, which is the drop zone for dragged links, as well as the position the new tab will open in. However, with this option disabled the existing Browser Tabs will fill the Browser Tab GUI element, hiding the drop zone. In order to expose the drop zone and open the new tab, the link must be dragged to the far right of the Browser Tab GUI element, at which point the existing tabs will dynamically shrink, and the new tab drop zone will be shown.
Browser Tabs Show Space (Before) Example
Example of Browser Tabs with "Show space for new tab" enabled (Drop zone visible)
Browser Tabs Show Space (During) Example
Example of Browser Tabs with "Show space for new tab" enabled (Drop zone highlighted)
Browser Tabs Dynamic Update (Before) Example
Example of Browser Tabs with "Show space for new tab" disabled (Drop zone invisible)
Browser Tabs Dynamic (During) Example
Example of Browser Tabs with "Show space for new tab" disabled (Drop zone highlighted)
In order to use the drop zone when you have a single browser open, you must enable Preferences » GUI » Show tab for single browser, otherwise the drop zone will not be available. It is strongly recommended that you enable this option to gain the full functionality of the browser Drag & Drop support.
Like some other elements of the GUI, keyboard control is also provided for some of the Browser Tabs, via (un-qualified) hotkeys. A list of all the standard IBrowse² shortcut hotkeys can be found in the Hotkeys chapter.

6 ~ Transfer Animation
Transfer Animation Example
This area of the main IBrowse² window(s) is one of the Drag & Drop GUI elements which can be moved around into various locations within the window itself. The Transfer Animation serves a simple purpose: to keep the user informed of any network activity. The Transfer Animation is browser dependant, so even if one of the inactive browsers is performing some network activity, but the current browser is not, the Transfer Animation will remain static.
The Transfer Animation can be removed from the GUI by disabling Preferences » GUI » Show transfer animation should you decide it takes up too much GUI space. Alternatively you can use Preferences » GUI » Toolbar » Animation to embed the Transfer Animation into the actual Navigation Toolbar, which can provide another way of reducing GUI space, as the Transfer Animation will be resized to match that of the largest toolbar button. If you were to set Preferences » GUI » Toolbar » Display to Text, you would reduce the Transfer Animation to the height of your text buttons, for example:
Transfer Animation In Navigation Toolbar Example
Example of Transfer Animation embedded into Navigation Toolbar
Finally, the Transfer Animation can be customised, but unfortunately, this cannot be performed via the IBrowse² preferences. Please refer to the Advanced Topics chapter for further details on customising the animation.
! The Transfer Animation will use a number of pens from the screen palette in order to be displayed. On screens of 8-bit or less (i.e. 256 colours and below), there are fewer pens available for IBrowse² to use when displaying web page images. It is therefore suggested to disable Preferences » GUI » Show transfer animation under these circumstances.

7 ~ Display Area
Display Area Example
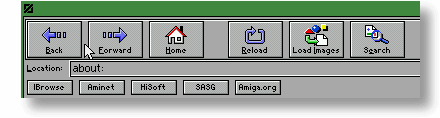
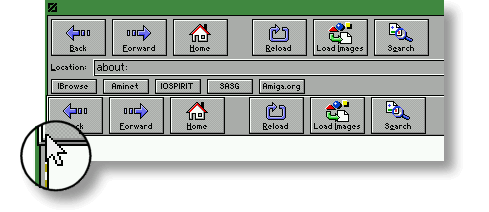
The Display Area of the IBrowse² GUI is probably the area of most interested to you, as it is where you will spend most of your time viewing. All displayable data that IBrowse² processes will be shown here, with the exception of those MIME Types that are passed onto External viewers.

Like the majority of the IBrowse² GUI, the Display Area is also fully Drag & Drop compatible, allowing you to drag items into, and out of the area. This allows you to drag a file into the Download Manager, to add new a Fastlink, or to drag a URL into a specific Browser Tab etc.

FAB Menus are also used in the Display Area, changing in context depending on what data is under the mouse at the time. This allows quick and easy access to frequently used commands, which can be configured to suit your requirements.

In order to provide feedback to the user, the Display Area also has a number of other visual techniques. Image Place Holders are used to reflect the status of image data when browsing without image loading enabled, or in the event of an error; and MUI Bubble Help, is used to provide a means of presenting errors, links, alternate text and other information in a text based style.

A ~ FAB Menus  FAB Menus
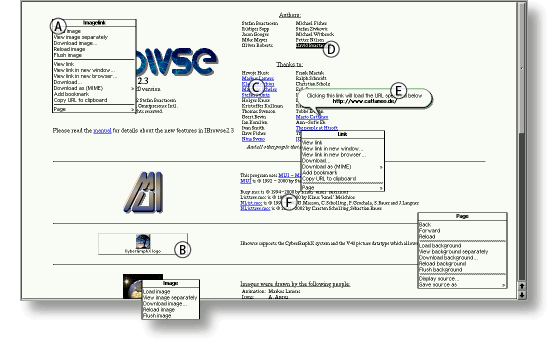
Using the right mouse button over different parts of the Display Area will open a FAB Menu in the context of the data that is under the mouse at that time. The four different FAB Menus that can be displayed are:
  • Page
  • Link
  • Image
  • Imagelink
The contents of each of the FAB Menus can be customised in the Preferences » GUI » FAB Menus section, where the standard FAB Menu options can be removed or reordered, and new custom options added. The standard FAB Menu entries are covered in the FAB Menu chapter.
B ~ Image Place Holders  Image Place Holders
IBrowse² will display an Image Place Holder when ever an image is not displayed, either due to an error, browsing with Preferences » HTML » Images » Load images, or Menus » Preferences » Image loading set to None, or after any images have been flushed using one of the Menus » Cache » Memory cache options. When IBrowse² knows an image size, the Image Place Holder will inherit the dimensions of the image it is replacing, and show an icon depicting its status or type. However, if the image dimensions are not known, the icon will be shown without a box indicating the size. The standard icons that will be shown are:
Standard Image Standard Image
This means the image not displayed is a standard image. It can be loaded by using the FAB Menus » Image » Load image option, the Navigation Toolbar » Load Images button, or the Menus » Webpage » Load images entry.
Imagemap Imagemap
This means the image not displayed is an imagemap. Imagemaps are usually used for navigation purposes around websites, so it is usually worthwhile loading these. Loading just imagemaps can be achieved by setting Preferences » HTML » Images » Load images, or Menus » Preferences » Image loading to Imagemaps.
Image Error Image Error
This means the image was not displayed due to an error. The error could be anything which results in the inability to load or display the file, such as a simple spelling mistake in the HTML source, resulting in the image not being found, or an unknown image format which IBrowse² is unable to handle. Using the MUI Bubble Help, you can find out the reason for the error as reported by IBrowse².
Using the right mouse button over an image will open a FAB Menu, the type of which depends on whether the image is a plain image or an imagelink. For the former, the FAB Menus » Image menu will be displayed, and for the latter, the FAB Menus » Imagelink menu. The options listed in either FAB Menu can be configured using the Preferences » GUI » FAB Menus options. If you have MUI Bubble Help enabled in the IBrowse² MUI settings, then pausing the mouse over an image will cause an MUI Bubble Help to open after the defined time. For both plain images and imagelinks, any text defined in the images alt="" attribute will be shown, with the addition of the links URL for those that are imagelinks.
Finally, the Image Place Holders can be customised, but unfortunately, this cannot be performed via the IBrowse² preferences. Please refer to the Advanced Topics chapter for further details on customising the images used.
C ~ Links  Links
In its default configuration, IBrowse² displays unvisited links with a solid underline, e.g. Unvisted Link Example, and visited links as a broken underline, e.g. Visited Link Example. The presence of the underline can be removed by disabling Preferences » HTML » Underline links. Visited links are remembered by IBrowse² for a certain period of time, as specified by Preferences » HTML » Links expire after, after which they are removed from the Global History Window. Using the right mouse button over a link will open a FAB Menu giving you access to the FAB Menus » Link options, which can be configured under Preferences » GUI » FAB Menus. If you have MUI Bubble Help enabled in the IBrowse² MUI settings, then pausing the mouse over an image will cause an MUI Bubble Help to open after the defined time, the contents of which will be the URL that will be opened when clicking on the link.
D ~ Text Highlighting  Text Highlighting & Copying
It is possible to copy text from web pages into the system clipboard, by highlighting the required text with the mouse while the left mouse button is held down. This will mark the text, which can then be copied using the standard AmigaOS® shortcut, RAmiga+C, or by using the Menus » Edit » Copy menu entry. Once the text has been copied into the system clipboard, the highlighting will be removed from the Display Area. This procedure can be improved by removing the need to use the shortcut or menu entry, and having IBrowse² automatically copy the highlighted text into the system clipboard for you. By enabling Preferences » General » Auto copy on select, IBrowse² will behave in this manner, copying the text as soon as you release the left mouse button, and automatically removing the highlighting.
! Highlighting italic text can leave a small graphical glitch at the start and/or end of the text when highlighting is removed. This will be addressed in the next release of IBrowse.
E ~ MUI Bubble Help  MUI Bubble Help
If you have MUI Bubble Help enabled in the IBrowse² MUI settings, then pausing the mouse over various data in the Display Area, will cause an MUI Bubble Help to open after the defined time. The contents of the MUI Bubble Help will vary from item to item as listed below:
  • Link: Will display the URL that will be opened when clicking on the link.
  • Image: Will display any text defined in the alt="" attribute.
  • Imagemap (Non-link area): Will display any text defined in the alt="" attribute.
  • Standard Image Place Holder: Will display any text defined in the alt="" attribute.
  • Imagelink: Will display any text defined in the alt="" attribute, and the URL that will be opened when clicking on the link.
  • Imagemap (Link area): Will display any text defined in the alt="" attribute, and the URL that will be opened when clicking on the link.
  • Error Image Place Holder: Will display the error that caused the image not to load.
F ~ Text  Text
Text displayed on web pages can be controlled either by IBrowse², or by the web page author. For <font> tags that do not have a face="" attribute, the text will be displayed in one of the fonts specified in Preferences » HTML » Fonts, namely Normal font for proportional text, and Fixed width font for text displayed as non-proportional (e.g. when using <tt>, <pre>, <code> etc.). Where a web page author specifies a face="" attribute, IBrowse² will try to match the face name against an entry in Preferences » HTML » Fonts. If a match is found, that font will be used, otherwise IBrowse² will use the Normal font or Fixed width font where necessary. By using Preferences » HTML » Fonts it is possible to customise how web pages look, to suit your requirements by forcing IBrowse² to override the fonts specified by the web page author.

8 ~ Status Toolbar
This area of the main IBrowse² window(s) is one of the Drag & Drop GUI elements which can be moved around into various locations within the window itself. The Status Toolbar is used to give you feedback about the status of the current browser, such as the connection type, amount of data transferred etc., as well as any JavaScript messages that the web page author has set on the web page.
Status Toolbar
A ~ Cache/Secure  Cache/Secure
This area of the Status Toolbar is used to display two items of information regarding the web page being viewed. The first is CACHE, which is used to indicate that the web page was loaded from your local cache, if one is specified under Preferences » Cache, rather than from the web server. Using Navigation Toolbar » Reload or FAB Menus » Page » Reload, will cause IBrowse² to re-request and download the web page from the web server, ignoring your locally cached version. The second item is SECURE, which is displayed when the web page being viewed is transmitted over a secure connection. Usually, this is denoted by the https:// protocol, but on some web pages with forms, the secure transfer might not come into effect until the form is submitted, so SECURE is there to inform you the connection is indeed being transferred via SSL.
B ~ Status Text  Status Text
This area of the Status Toolbar serves two purposes, one to display the current status of the browser during communication with the web server, and the other to display JavaScript messages that are set via the window.status and window.defaultStatus properties. When you load a web page, IBrowse² goes through a series of steps before the actual transfer commences. Each of these steps is indicated visually by a different colour LED in the Netstat LEDs, and is duplicated in text form in this area of the Status Toolbar. The different status shown are:
Looking up servername.
This indicates the connection is looking for the details of the server to connect to. The name of the server will be shown in place of servername when it is known.
Making protocol connection to servername.
This indicates the server has been found, and IBrowse² is attempting to make a connection. The protocol of the connection that is required will be shown in place of protocol, with the server name shown in place of servername, when it is known.
Sending protocol request.
This indicates the connection has been made to the server, and IBrowse² has sent a protocol request, the name of which will be shown in place of protocol when it is known.
Done sending protocol request; waiting for response.
This indicates the protocol request was successful and IBrowse² is now awaiting a response from the server.
e.g. the response could be: proceed, there is an error, a page redirection etc.
Redirected to: servername
This indicates the response from the server was that the web page has been moved, and IBrowse² is redirecting to the server shown in servername.
Transferring data.
This indicates that IBrowse² is in the process of transferring data from the web server.
Posting multipart form data (xxx of xxx posted)
This indicates that IBrowse² is in the process of transferring data to the web server, during a file upload.
C ~ Bytes Transferred  Bytes Transferred
This area of the Status Toolbar is used to display the amount of bytes read, against the total bytes being transferred by the open network connections, as shown by the Netstat LEDs and Netstat Manager. It is shown in the form xxx of xxx read, the first xxx being the current bytes transferred, and the second xxx being the total bytes to transfer. As extra connections, up to the number specified for the Preferences » Network » Max. number of connections setting, are made to the web server you may notice the second xxx increase and as connections are closed after they have transferred their data, the figure decrease.
D ~ Busy/Progress Bar  Busy / Progress Bar
This area of the Status Toolbar is used to show either a busy bar, or progress bar. They are displayed at different times depending on what activity IBrowse² is actually doing i.e. connection negotiation, data transfer or nothing. When you first open a web page, the busy bar will be shown during the negotiation stages, as described in Status Text. Once this reaches the Transferring data stage, this will change to a progress bar to graphically mirror the information shown in the Bytes Transferred area. Finally, once all network activity has completed and the web page has fully loaded, the progress bar will clear and nothing will be displayed in this area.
E ~ Netstat LEDs  Netstat LEDs
This area of the Status Toolbar is used to show a graphical representation of the Netstat Manager. The number of LEDs shown will depend on your setting for Preferences » Network » Max. number of connections, and each connection will go through the negotiation stage with the web server in question. The different colours of the LEDs reflect this information, and are as follows:
Black LED  Black
This indicates the connection is not currently being used, and is available for IBrowse² to use when required..
Blue LED  Blue
This indicates that IBrowse² is looking for the details of the server to connect to.
White LED  White
This indicates the connection has been requested to the server and/or the file itself has been requested.
Orange LED  Orange
This indicates the request was successful and IBrowse² is now awaiting a response from the server.
Green LED  Green
This indicates that IBrowse² is in the process of transferring data from the web server.
Red LED  Red
This indicates that IBrowse² has aborted the connection due to an error. This could be a problem at the remote web server, or a more local problem such as a DNS error at your ISP.
Whilst the Netstat LEDs give you feedback of what each connection is doing, the Netstat Manager can be used to control these connections, allowing you to abort them all, or individually. Apart from using Menus » Windows » Netstat Manager or the shortcut key, you can also click on the Netstat LEDs to open the Netstat Manager.

Drag & Drop
MUI Drag & Drop SettingsThe different GUI elements that make up the main IBrowse² window(s) can be rearranged using MUIs Drag & Drop feature. By clicking on one of the compatible GUI elements, you can drag it to an alternative location, and drop it into place over the highlighted drop zone.

The way the Drag & Drop behaves on your system will depend on your MUI settings, so your results may differ to those here. The settings used in these examples are shown on the right.

In order to pick up a GUI element, you must click in an area that will allow the Drag & Drop process without activating any of the gadgets, e.g. between two gadgets or over a label etc. Doing so will result in a frame appearing around the entire GUI element, indicating the Drag & Drop process has begun.
! When picking up the Navigation Toolbar to perform a Drag & Drop procedure, if you try and click where the Stop button is usually displayed, you will not be able to pick up the GUI element. This will be addressed in the next release of IBrowse.
Starting Drag & Drop
Once a GUI element is picked up for Drag & Drop'ing, you will notice that moving the mouse around the window will trigger the drop zones to be highlighted. These drop zones are intelligent and will only be highlighted if the GUI element you are dragging is capable of being dropped in that area. Releasing the left mouse button will then cause the GUI to redraw with the element in its new location. The zoomed in area of the image below, shows how the drop zone is highlighted - indicated by a dashed line.
During Drag & Drop
Depending on the orientation of the new location, the GUI element may be rearranged to fit into the new area, e.g. dropping the Navigation Toolbar from a horizontal location to a vertical location will result in the buttons being reordered vertically.
After Drag & Drop

<< Installation Chapter Contents Chapter FAB Menus Chapter >>

Valid XHTML 1.0! ~ Upload This Local File To http://validator.w3.org To Validate Yourself

IBrowse² Documentation v2.3 © 2002, 2003 Dave Fisher ~ IBrowse² Development Team Revision 1.0